
cgefnnkodedakpnlnbagmlnaggncamon
make ClickUp support RTL and bigger text to be readable make ClickUp support RTL and bigger text to be readable

Clickup Custom Shortcuts
Add ability to set keyboard hotkeys for task actions According to missed functionality in Clickup app, with this addon we can set task to done in task view, open full screen mode in task view, expand the description field to have more flexibility on task view. You had to customize the navigation shortcut keys by entering "chrome://extensions/shortcuts" in your address bar.

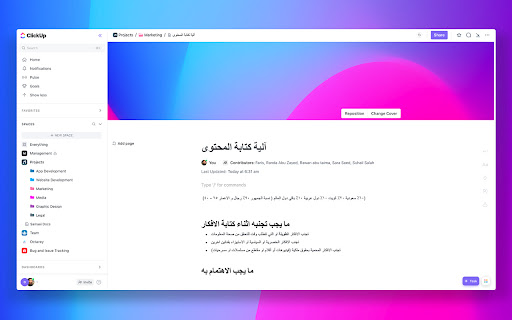
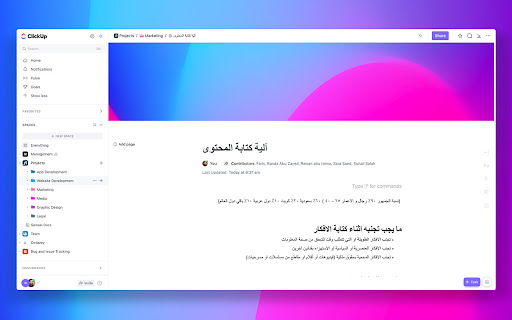
RTL Support for ClickUp
Add RTL support to ClickUp.com for a better experience in Arabic, Hebrew, Persian, and more. Enhance your ClickUp experience with seamless right-to-left (RTL) support! This extension automatically adjusts the interface of ClickUp.com to provide proper alignment and text direction for languages like Arabic, Hebrew, Persian, and others that require RTL layout. ### Key Features: - Automatically applies right-to-left text direction for supported languages. - Improves readability and usability for RTL users on ClickUp. - Simple and lightweight—works instantly without any configuration. Perfect for teams and individuals who prefer working in right-to-left languages while using ClickUp for productivity and project management. Experience a smoother workflow with this must-have extension!

ClickUp: Tasks, Screenshots, Email, Time
ClickUp is a productivity platform that makes your personal and work lives more productive, saving you time. ClickUp's revolutionary Chrome Extension replaces five separate apps, virtually allowing you to do anything! 1. Create Tasks & Save Websites as Tasks 2. Time Tracking: Easily attach time to ClickUp tasks 3. Screenshots: Capture, mark up, and edit screenshots 4. Email: Create tasks and attach emails to tasks 5. Notepad ClickUp is free forever for up to 100MB of files storage. Installing the Chrome Extension 1. Click ADD TO CHROME 2. Click Add extension in the next popup 3. Click the ClickUp extension icon at the top of your browser window. 4. Log in to your ClickUp Account 5. Select the Workspace(s) that should have access Creating a new task 1. Select the "New Task" tab 2. Write a title for your task 3. Add assignees and a due date 4. Write a description for your task. (Pro tip: Use Markdown Shortcuts in your description fast rich text editing) 5. Click Create New Task Bookmark a site as a task 1. Click on the Bookmark tab 2. This automatically sets the page title & URL as the task title 3. You can also add a description here 4. Then you'll also be given the option to attach a screenshot of the website to the task by clicking Include screenshot Set a Default List Save a default destination for tasks making this the fastest way to add new tasks! Simply locate a task in the extension and select it to begin tracking time. From the Time Spent window, you are able to view time logged on recent tasks and even remove time that was accidentally logged. Back in the ClickUp task, the time has been logged, and we can even start the extension's timer from within the task. Screenshots: capture, mark up, and edit screenshots Capture Capture your entire browser tab or select a certain area to add to a task or download to your computer Attach Attach the file to an existing task or create a new one Mark Up The extension grants you extremely detailed mark up functionality: Paintbrush - draw what you want on top of the screenshot - set a color and brush size Arrow, line, circle, square - quickly add shapes to highlight areas of the screenshot - set a color and brush size Text - add notes right onto a screenshot - set a color, size, and substrate (background) Blur - select an area of the screen you would like to remain hidden. Numbers - drop increasing numbered markers on your screenshot - dragging and dropping allows you to create a box with the number - perfect for sharing steps with a team member Pointer - select things you've already added to the screenshot and make adjustments Undo / Redo Attach to comments 1. Take a screenshot with the Chrome Extension 2. With the screenshot still in the extension, open a task in ClickUp 3. Open the comment editor 4. Click the "Chrome attachment" button Email: Create tasks and attach emails to tasks Capture an email Click the Add to ClickUp button in your email to generate a full HTML record of the email. Attach emails to tasks and create tasks from emails ClickUp will attach the email to a task or create a brand new one with the email attachment included so you can quickly view, jump back, or download the email! For more info, check out our doc on attaching emails to ClickUp! You can also access your ClickUp notes from any page. Open the extension to the Notepad tab, and all of your notes are available from ClickUp. Your notes will sync across all your devices. Use Markdown Shortcuts and Rich Text in any note. When hovering over a note, you will be able to rename the note, archive, delete, and convert the note to a task. While inside a note, at the bottom are the options to see earlier versions of the note, open the fullscreen editor, as well as the option to convert the note to a task. The ClickUp button gives you quick access to the Notepad, Bookmarks, Screenshots, Time Tracking, and creating a task from any webpage. To move the button, click and drag it to any spot on the page. To hide the button, hover over the x icon. You can choose to hide the button for the current session, always for the current website you're on, or turn them off all together.

Save Links to ClickUp
Save Links to ClickUp helps to manage all your hyperlinks in ClickUp document easily. Save Links to ClickUp is a simple and easy to use tool for managing the hyperlinks in ClickUp document. This extension helps the user to store important Links according to various categories. So next time the user wants to access any link from their document they can simply open the extension and access them. 𝐅𝐞𝐚𝐭𝐮𝐫𝐞𝐬: ●Easy , Simple UI ●Create new categories ●View links ●Add title to your links. ●Delete link 𝐔𝐬𝐞𝐫-𝐆𝐮𝐢𝐝𝐞: 1.Install the Extension . 2.Click on Connect and wait for few seconds. 3.Wait till a window for clickUp authorization opens. 4.Login with your clickUp Id(email) and password. 5.Select the team , then select the space within the team and finally select the folder inside which you want to store all the hyperlinks. 6.Make sure that you create a folder(for the links) in advance at clickUp website. 7.Now you are all set . 8.To create a new category simply type the category name and click on Add category. 9.To select a category click on "Select the Category" dropdown. 10.All Links within the category will be displayed. 11.To open a link click on the hyperlink or the title . To delete it click on the delete button. 12.To add a link select the category and enter the link title and the link in their respective section , then click on the "Add Link" button . 13. In case you find any difficulty simply restart the extension and also check the internet connection.