
pnlpbkniadcljbhebdjokkkeobenpefj

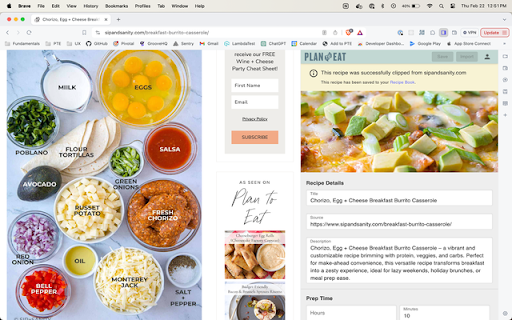

A recipe import companion tool for Plan to Eat web and mobile apps The Plan to Eat Recipe Clipper makes meal planning more painless than ever with easy import and editor features. With the Plan to Eat extension, you can: - Import recipes from thousands of websites, blogs, and social media into your Recipe Book — without ever leaving the browser - Tweak imported recipes in the integrated Recipe Editor with support for ingredients, directions, prep notes, categories, nutrition facts, and more - Rate recipes and upload your own photos - Get notified if you've already imported a recipe to avoid duplicates - View the Recipe Editor in a side panel that doesn't cover up content on the current page - Continue scrolling and navigating in your browser without disturbing or losing changes to the current recipe Sign in with your email, Google, or Facebook account to get started.

Copy Me That
Copy any recipe from any website with just one click. Recipe manager, shopping list, and meal planner. Manage all your recipes in… Copy any recipe from any website with just one click. Recipe manager, shopping list, and meal planner. Manage all your recipes in one location. Edit copied recipes or add your own. Organize with collections. Add recipes to your shopping list and cross items off when you're in the supermarket. Plan meals with the meal planner. Share your recipes and get inspired by others.

Samsung Food
Save recipes from anywhere across the web. The Samsung Food button allows you to save recipes from all your favorite sites. You can also sort and organize all your recipes into collections. Once recipes are saved to Samsung Food you can easily scale servings and generate shopping lists with one click! Samsung Food’s shopping list intelligently combines ingredients from multiple recipes so you buy just the right amounts. Samsung Food makes planning and shopping easy with collaborative lists you can share with friends and family. Take your list to the store or buy ingredients online with integrated retailers. All your saved recipes are synced to your Samsung Food account available on app.samsungfood.com.

CookBook Manager - Recipe Importer
Import recipes to your CookBook Manager App account from Chrome! CookBook Recipe Clipper for Chrome Save any recipe you find online straight to your CookBook library with one click. The CookBook extension turns your browser into the fastest recipe collector so you never lose a dish again. KEY FEATURES • One‑click capture: grabs ingredients, instructions, images and nutrition data while you browse. • Import from anywhere: clip recipes from Instagram, TikTok, Facebook, Pinterest, your cookbooks and more! • AI smart import: cleans up formatting and links ingredient amounts • AI Chef: generate new recipe ideas, variations and ingredient swaps in seconds. • Sync everywhere: recipes appear instantly in your CookBook iPhone, iPad, Android and web apps. • Meal planning and grocery lists: send saved recipes to your meal planner and create a smart shopping list that syncs across devices. • Macros and nutrition tracking: view calories, protein, carbs and fats for each recipe, then track daily totals in the planner. • Organise your way: tag by cuisine, course or diet, create custom tag collections and mark family favourites. HOW TO USE 1. Click “Add to Chrome” and pin the CookBook icon to your toolbar. 2. Log in with your CookBook account or start a free 7‑day trial. 3. When you are on a recipe page, click the CookBook icon. 4. Either click Save or Edit. FAQ Q: Is it free? A: We offer limited use for free. Unlimited clipping needs an active CookBook subscription. Q: Does my subscription work on mobile and web? A: Yes. Sign in with the same CookBook account on any device. SUPPORT Questions or feedback? Email team@cookbookmanager.com and we will help.

ClickUp: Tasks, Screenshots, Email, Time
ClickUp is a productivity platform that makes your personal and work lives more productive, saving you time. ClickUp's revolutionary Chrome Extension replaces five separate apps, virtually allowing you to do anything! 1. Create Tasks & Save Websites as Tasks 2. Time Tracking: Easily attach time to ClickUp tasks 3. Screenshots: Capture, mark up, and edit screenshots 4. Email: Create tasks and attach emails to tasks 5. Notepad ClickUp is free forever for up to 100MB of files storage. Installing the Chrome Extension 1. Click ADD TO CHROME 2. Click Add extension in the next popup 3. Click the ClickUp extension icon at the top of your browser window. 4. Log in to your ClickUp Account 5. Select the Workspace(s) that should have access Creating a new task 1. Select the "New Task" tab 2. Write a title for your task 3. Add assignees and a due date 4. Write a description for your task. (Pro tip: Use Markdown Shortcuts in your description fast rich text editing) 5. Click Create New Task Bookmark a site as a task 1. Click on the Bookmark tab 2. This automatically sets the page title & URL as the task title 3. You can also add a description here 4. Then you'll also be given the option to attach a screenshot of the website to the task by clicking Include screenshot Set a Default List Save a default destination for tasks making this the fastest way to add new tasks! Simply locate a task in the extension and select it to begin tracking time. From the Time Spent window, you are able to view time logged on recent tasks and even remove time that was accidentally logged. Back in the ClickUp task, the time has been logged, and we can even start the extension's timer from within the task. Screenshots: capture, mark up, and edit screenshots Capture Capture your entire browser tab or select a certain area to add to a task or download to your computer Attach Attach the file to an existing task or create a new one Mark Up The extension grants you extremely detailed mark up functionality: Paintbrush - draw what you want on top of the screenshot - set a color and brush size Arrow, line, circle, square - quickly add shapes to highlight areas of the screenshot - set a color and brush size Text - add notes right onto a screenshot - set a color, size, and substrate (background) Blur - select an area of the screen you would like to remain hidden. Numbers - drop increasing numbered markers on your screenshot - dragging and dropping allows you to create a box with the number - perfect for sharing steps with a team member Pointer - select things you've already added to the screenshot and make adjustments Undo / Redo Attach to comments 1. Take a screenshot with the Chrome Extension 2. With the screenshot still in the extension, open a task in ClickUp 3. Open the comment editor 4. Click the "Chrome attachment" button Email: Create tasks and attach emails to tasks Capture an email Click the Add to ClickUp button in your email to generate a full HTML record of the email. Attach emails to tasks and create tasks from emails ClickUp will attach the email to a task or create a brand new one with the email attachment included so you can quickly view, jump back, or download the email! For more info, check out our doc on attaching emails to ClickUp! You can also access your ClickUp notes from any page. Open the extension to the Notepad tab, and all of your notes are available from ClickUp. Your notes will sync across all your devices. Use Markdown Shortcuts and Rich Text in any note. When hovering over a note, you will be able to rename the note, archive, delete, and convert the note to a task. While inside a note, at the bottom are the options to see earlier versions of the note, open the fullscreen editor, as well as the option to convert the note to a task. The ClickUp button gives you quick access to the Notepad, Bookmarks, Screenshots, Time Tracking, and creating a task from any webpage. To move the button, click and drag it to any spot on the page. To hide the button, hover over the x icon. You can choose to hide the button for the current session, always for the current website you're on, or turn them off all together.