
olnlijgcdflbdkcmhomlnldhcobopeeh


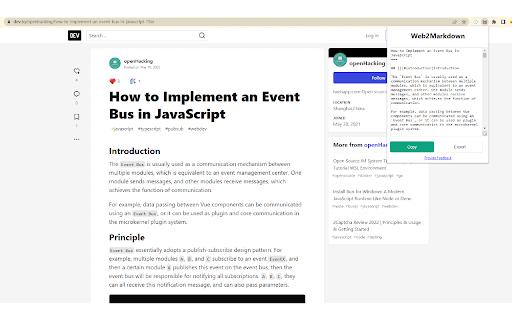
🚀 Description Web2Markdown lets you convert the current web page into clean, readable Markdown with one click. It preserves key structure like headings, text, links, and images so you can save, organize, and share content more efficiently. 💪 Supported Sites Works on almost all websites and blogs. Most pages use a universal parser, while some sites are specially optimized for high-quality Markdown export, including: 1. ChatGPT (chatgpt.com / chat.openai.com) 2. notion.site 3. medium.com 4. dev.to 5. zhuanlan.zhihu.com If you find parsing issues on any site, please send feedback and we’ll improve support quickly. ⚒️ How to Use 1. Click the Extensions icon in your browser toolbar, find Web2Markdown, and pin it 2. Open any page and click the pinned Web2Markdown icon 3. The converted Markdown appears instantly in the panel; copy it or download as `.md` 4. Enable/disable metadata insertion in settings; sign in to use Pro features (Obsidian/Notion saving) 🔐 Privacy - Conversion runs locally in your browser - Web page content is not uploaded or stored during conversion - Pro features require account sign-in 💎 Free vs Pro - Free: One-click conversion, copy to clipboard, download `.md` - Pro: Save to Obsidian, save to Notion, smart metadata, enhanced parsing for complex sites, priority support - Pricing: https://web2markdown.pro/pricing

Web Scraper - Free Web Scraping
Web data extraction tool with an easy point-and-click interface for modern web Free and easy to use web data extraction tool for everyone. With a simple point-and-click interface, the ability to extract thousands of records from a website takes only a few minutes of scraper setup. Web Scraper utilizes a modular structure that is made of selectors, which instruct the scraper on how to traverse the target site and what data to extract. Thanks to this structure, data mining from modern and dynamic websites such as Amazon, Tripadvisor, eBay, as well as from lesser-known sites is effortless. Data extraction is run on your browser and doesn’t require anything to be installed on your computer. You don't need Python, PHP, or JavaScript coding experience to start scraping. Additionally, it is possible to completely automate data extraction in Web Scraper Cloud. Once the data is scraped, download it as a CSV or XLSX file that can be further imported into Excel, Google Sheets, etc. Features Web Scraper is a simple web scraping tool that allows you to use many advanced features to get the exact information you are looking for. It offers features like: * Data scraping from multiple pages; * Multiple data extraction types (text, images, URL’s, and more); * Scraping data from dynamic pages (JavaScript + AJAX, infinite scroll); * Browsing scraped data; * Exporting scraped data from a website to Excel; It is dependent only on the web browser; therefore, no extra software needed for you to start scraping. How to begin scraping? There are only a couple of steps you will need to learn in order to master web scraping: 1. Install the extension and open the Web Scraper tab in developer tools (which has to be placed at the bottom of the screen); 2. Create a new sitemap; 3. Add data extraction selectors to the sitemap; 4. Lastly, launch the scraper and export scraped data. It’s as easy as that! What can Web Scraper be used for? * Lead generation - email, phone number, other contact detail related data mining from various websites; * E-commerce - product data extraction, product price scraping, description, URL extraction, image retrieving, etc; * Website content crawling - extract information from news portals, blogs, forums and so on; * Retail monitoring - monitor product performance, competitor or supplier stock and pricing, etc; * Brand monitoring - product review, social content crawling for sentiment analysis; * Business intelligence - gather data for key business decisions, learn from your competitors; * Big data extraction for machine learning, marketing, business strategy developments, researches; * And much more. Web scraping can be a little bit difficult at first, that's why we have created informational guides that can help you. For video tutorials, documentation, how-to’s, playground web pages and blog, visit our website: https://www.webscraper.io/ If you want to discuss web scraping, request features, ask questions or submit bugs, visit our friendly forum here: https://forum.webscraper.io/ Regarding the privacy policy of our product, see “Browser Extension Privacy Policy” at https://webscraper.io/extension-privacy-policy Thank you for choosing us!

HTML to Markdown
HTML to Markdown – a straightforward Chrome extension designed to convert most web pages into markdown format effortlessly. As a developer, I often found myself needing to pull high-quality documentation from websites and reformat it for use with AI chat tools. That's why I created the "HTML to Markdown" Chrome extension. This free tool quickly converts web page content into clean Markdown, making it perfect for feeding into large language models or any other AI powered chats. Bloggers & Content Creators: Easily grab content from articles or research pages for your own posts. Developers: Copy code snippets and documentation into README files, project notes, or for use with large language models. Students & Researchers: Quickly extract information from online resources for papers and reports. Technical Writers: Convert website content to create guides and documentation. AI Integration: Extract and convert relevant website information into markdown for input into AI powered chat tools.

markClipper - obsidian web clipper
📢 markClipper saves clipped web contents directly to your obsidian vault without any config. Al summary. Open source. 📌 Why you should consider this: ✪ Save web contents directly to obsidian's vault ✪ Clip web contents into markdown format ✪ Al summary, Mindmap and Highlight powered by ChatGPT ✪ Capture screenshot and insert it into vault in two clicks. ✪ Insert image into your obsidian's vault ✪ Insert current tab or all tabs' articles ✪ Drag-n-drop images and selected text ✪ Highlighter and insert highlighted text into notes ✪ Zero config and no separate obsidian plugins are required ✪ No need to keep obsidian app open. ✪ No signup required ✪ Free and Open source:https://github.com/anilkumarum/mark-clipper ✪ You can also insert clipped contents into Joplin or Logseq ✪ Lightweight & 75KB only ✪ Themes ✪ no tracking, no Ads ✪ dark mode ...more keyboard shortcuts on extension's options page Note: This is unofficial markdown web clipper extension for Obsidian. ✅ Save content directly to Obsidian's vault Give file permission and your work is done. Extension convert web content into markdown format and directly insert formatted web contents into your vault ✅ Clip article in one click If you want summarize current webpage or create mindmap then change clip content type. keyboard shortcut: Alt +A (works when popup window open) Clip article from current tab or all open tabs in one click. you can add frontmatter and download articles' images into "images" folder. ✅ Persistent text Highlighter Highlight text and save highlighted text into selected notes. Highlighted text will be visible when you re-visit webpage For remove highlight, Select again highlighted text and press Ctrl + Shift + H. For disable highlight, Go to options page Fastest highlighter in Chrome web store. markClipper highlights text without creating new DOM elements. Read more: https://web.dev/dom-size-and-interactivity/ ✅ Save images with correct file path This extension insert image file into your vault and adds correct image path as markdown link in selected notes if you need to save images from clipped articles then you need to enable it from extension's options page. If you want to change download images folder location, config in options page ✅ Work with any local folder not only vault Give write permission in any local folder e.g “downloads/web-clipped” or “vault/web-clipped” You can use this extension for clip web contents into "Logseq" or "Joplin" ♻️ Permissions sidePanel:Show side panel activeTab:Required to read current tab's title and url scripting:Inject screenshot and markdown converter tools storage:Save extension configurations contextMenu:Add context menu on images ⌨️ Keyboard shortcuts Ctrl+Shift+X: Open extension's popup window Alt + S: Capture screenshot For config keyboard shortcuts, paste this url in address bar: chrome://extensions/shortcuts Alt+I ⇒ Insert frontmatter in open notes (focus require on notes or window) Alt + Z ⇒toggle word wrap in open notes (focus require on notes or window Alt+A ⇒ Clip article (work when popup window open) Alt+T ⇒ Open side panel (work when popup window open) Alt+M ⇒ Multi select text Ctrl + B , Ctrl + I ⇒ format bold, italic Delete ⇒ delete line in note in side panel For Brave browser File API is disabled by default. You need to enable this flag "brave://flags/#file-system-access-api" to work in brave browser. Edge browser I don't test this extension in Edge browser. Maybe work Opera browser I don't test this extension in Opera browser Arc browser I cann't test this extension in Arc browser because arc browser is not available on linux and arc browser doesn't provide extension developer docs ℹ️ Support Please report issues on github issues https://github.com/anilkumarum/mark-clipper/issues For detail guide, visit:https://markclipper.noterail.site/guide For contact, Please mail us on 📧 noterailhelp@gmail.com Join markClipper on google Groups: https://groups.google.com/g/markclipper You can change side panel position from settings -> appearance 🚀 Version 1.0.16 ⇒ FIXED: Can't summarize webpage when chatGPT logged in ⇒ FIXED: Cross-origin clip image ⇒ FIXED: Highlighted text don't show on page reload ⇒ FIXED: Note/Image don't save in user defined folder 🚀 Version 1.0.13 ⇒ FIXED: whitespace between texts ⇒ FIXED: metadata not show in obsidian bug fixed ⇒ IMPROVED: Rich bookmark with thumbnail & description ⇒ ADDED: Description added in frontmatter ⇒ ADDED: Frontmatter auto-added when clip article 1.0.11 ⇒ ADDED: ChatGPT AI summary, MindMap and Highlight added ⇒ ADDED: Now you can change Download images folder location ⇒ ADDED: Now you can change new note filename format ⇒ ADDED: Now you can change new note folder path ⇒ ADDED: Press Alt + C to copy current focused note 🚀 Version 1.0.2 ⇒ FIXED: Add note in note selectlist(maulti-select,screenshot,right click) when new note created ⇒ FIXED: Note selectlist is empty when extension updated ⇒ FIXED: Nested note now available in popup bookmark note list ⇒ FIXED: 2 layer Nested note path issue fixed in right click context menu ⇒ ADDED: notify via toast when clip images, multi select text ⇒ ADDED: cancel select button added in multi select text ⇒ ADDED: Insert pdf file button show when pdf file open in tab ⇒ markClipper now available in 16+ languages ✅ Added - Create new note option in screenshot, multi select text, context menu - show dialog when vault permission required - add permission manager page link in options and popup page ⌨️ Shift + Space for extend selection (when copy-listener active) ⌨️ Alt + H for highlight text (when copy-listener active) 🌈 Theme configuration added 🚀 0.0.8 🖍 Save highlighted text 📍Mutli select text 📝 Basic editing helper added e.g open enter open marker (*([_) then closing marker (*)]_) auto added 🎲 Undo(ctrl+z) & Redo (ctrl+Y) support on ctrl+c copy and drag-n-drop text Ctrl+Shift+X to open popup window ⌨️ Ctrl + C auto-copy into selected note when side panel open ⌨️ Alt + A keyboard shortcut to clip artice (open popup window open) ⌨️ Alt + M keyboard shortcut to enable multi select text (open popup window open) 🚀 0.0.5 release 🖍 Text Highlighter added 🌅 Saved imaged from clipped articles added 🐛 Medium.com bug fixed 🐛 Duplicate permission page issue fixed 📁 Images now saved in `images` folder ⚠️ Read all data from all sites permission removed

Markdown Sticky Notes
Markdown Sticky Notes web extension - Create new notes by clicking on the extension icon - Auto save content and position in the web page - Nice markdown editor & result - Draggable, resizable - Customizing note colors - Multiple editor theme and font styles - Shortcut: alt + m (mac: option + m)